Github Codespaces: Just Wow!
Goodbye to Local Development? How Codespaces on Github Can Change the Game.
Table of contents
Every developer has heard of GitHub, I would be surprised if you haven't, you may have heard of GitHub Copilot too, or even the fancy guy in town ChatGPT but have you heard of GitHub Codespaces?
I used Codespaces today and I was blown away, believe me, not everything that makes the news eventually catches my fancy when I try it out.
So what is GitHub Codespaces?
You know how with the advent of cloud servers we didn't need to set up physical servers in order to deploy our applications online, yes that is what Codespaces just did but to your local development environment on your computer. If you didn't understand that here's what it means; Codespaces took your development environment on your computer, that is your code editor ( Visual Studio Code, JetBrains, and Jupyter ) fully configured with your extensions, settings sync, terminal, debugger, version control and took it to your browser. Yes, you can now spin up a fully configured development environment in your browser and work from any device at any time and anywhere.
Creating your codespace
The codespace creation process
When you create a codespace, a number of steps happen to create and connect you to your development environment —though this does not include every little detail but just a clue of the core processes involved at each stage.
Step 1: VM and storage are assigned to your codespace.
Step 2: A Container is created and your repository is cloned.
Step 3: You can connect to the codespace.
When your container has been created and any other initialization has run, you'll be connected to your codespace. You can connect to it by using:
Your browser.
The Visual Studio Code desktop application
JetBrains IDE.
Command Line with GitHub CLI.
Step 4: Codespace continues with the post-creation setup.
For more information on what happens when you create a codespace, take a deep dive here.
In this article I'll briefly talk about how to create a Codespace in a browser and in the Visual Studio Code desktop application.
For how to use Codespaces in a JetBrains IDE, click here.
For how to use Codepsaces in the Command Line with the GitHub CLI, click here.
In the web browser, there are a number of entry points to create a codespace.
From a GitHub template or any template repository on GitHub.com to start a new project
From a branch in your repository for new feature work
From an open pull request to explore work-in-progress
From a commit in a repository's history to investigate a bug at a specific point in time
From a template repository, click on the green button that says "Use this template". In the drop-down that appears click on "Open in a codespace"
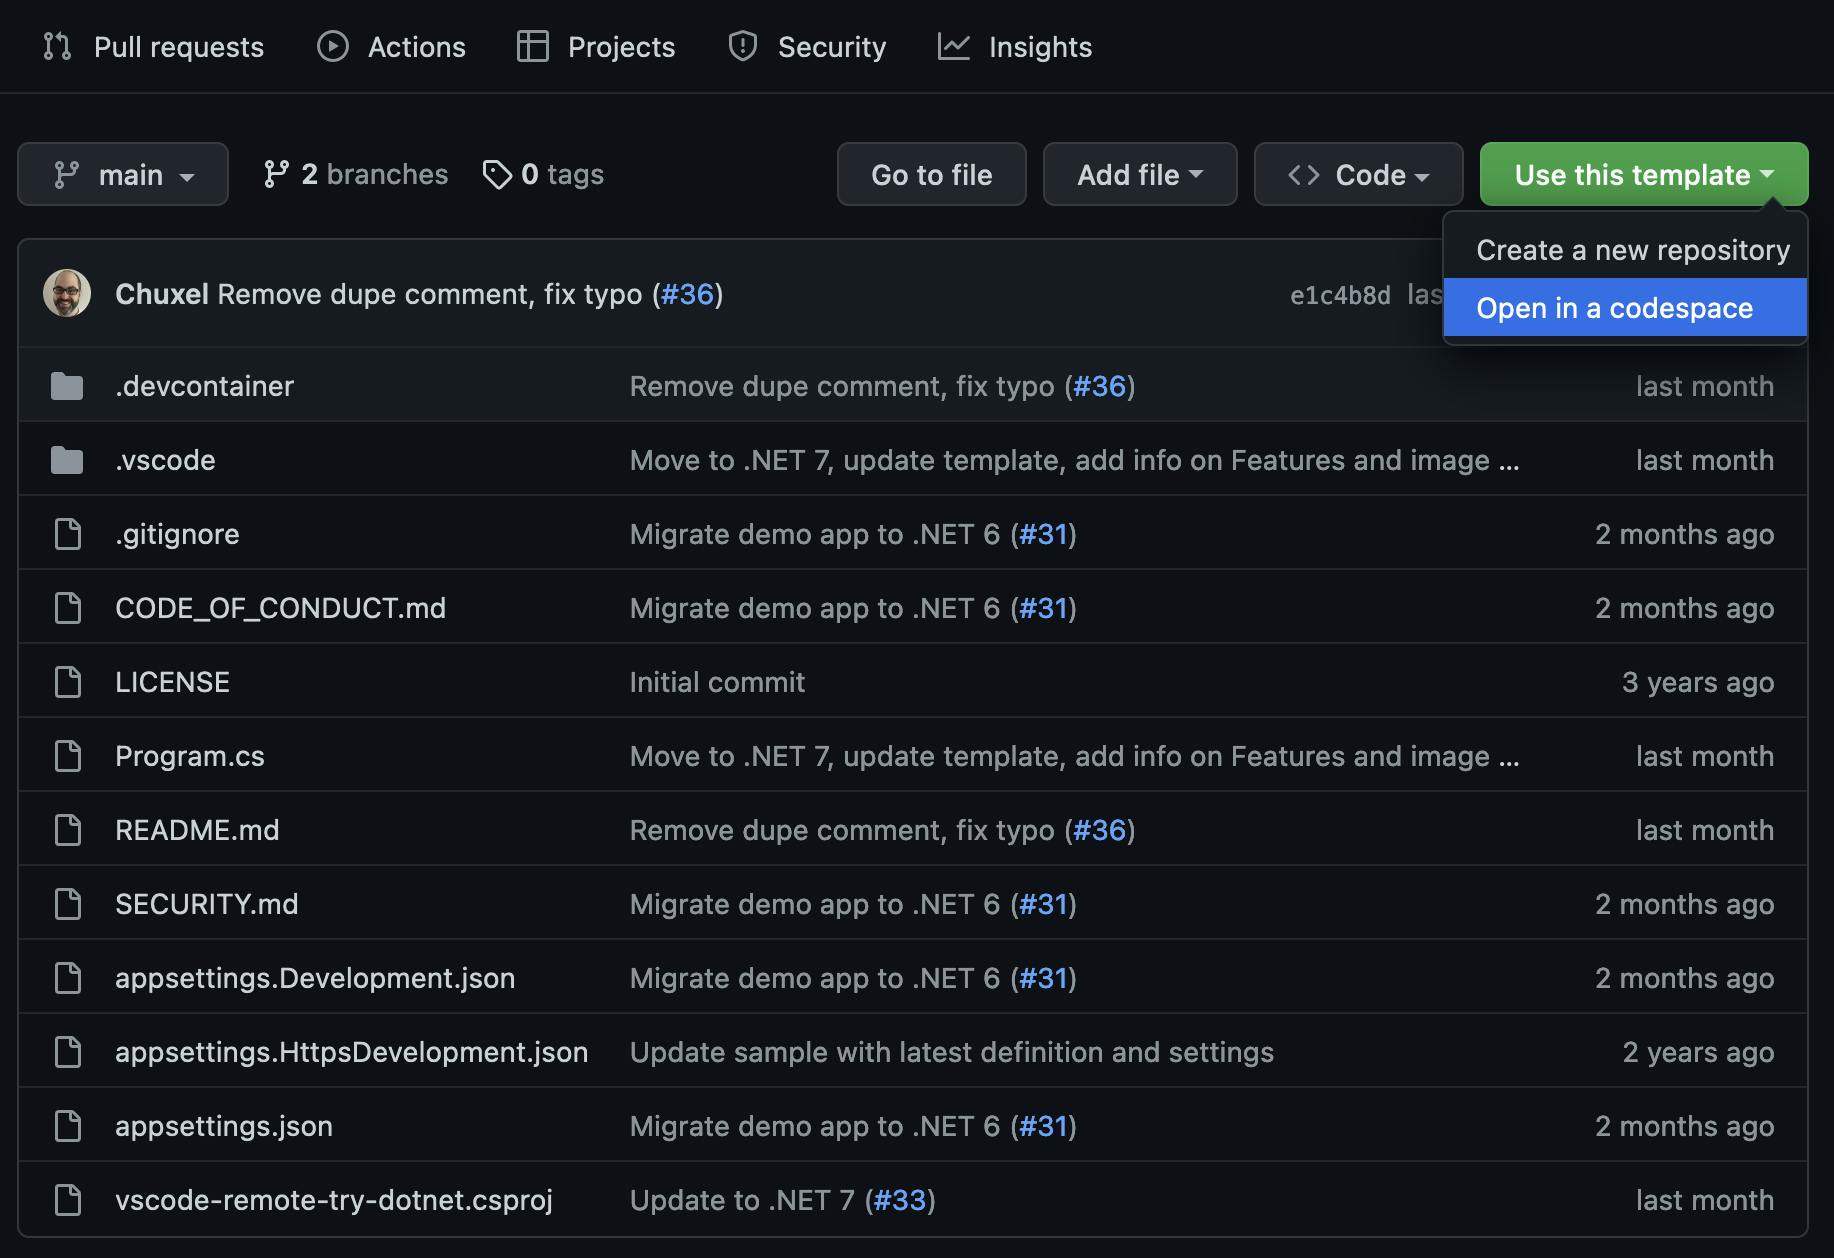
From a branch in your repository for new feature work, click on the green button that says "Code" and on the drop-down click on Codespaces. You can now create a Codespace on the '+' icon or on the green button that says "Create codespace on main". In this example, I'm on the main branch, if you want to create a Codespace on another branch, click on the branch icon and switch to your desired branch then create a Codespace. If you create a Codespace this way, it configures your Codespace environment using the default setting and opens it in a Visual Studio Code instance in your browser.
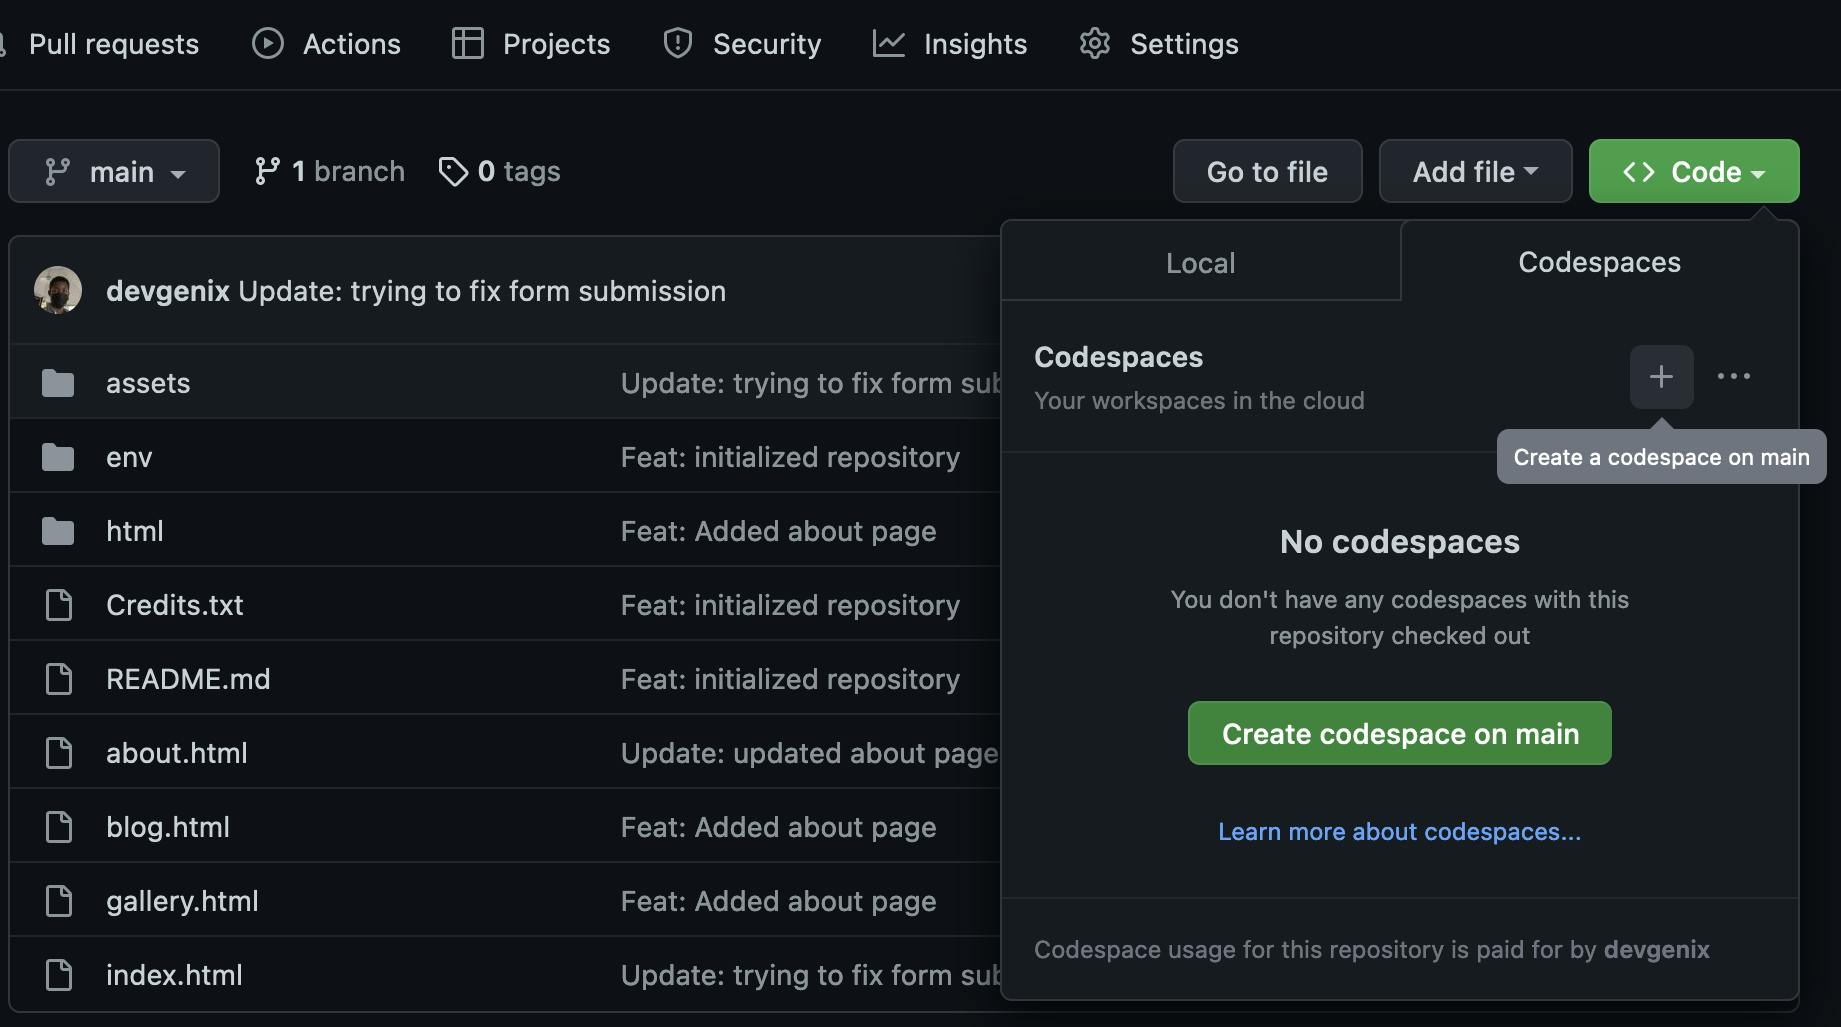
To customize the setting for the Codespace, click on the ellipse (...) and then click on "New with options..."
Then configure the settings as you wish and when done, click on "Create Codespace"
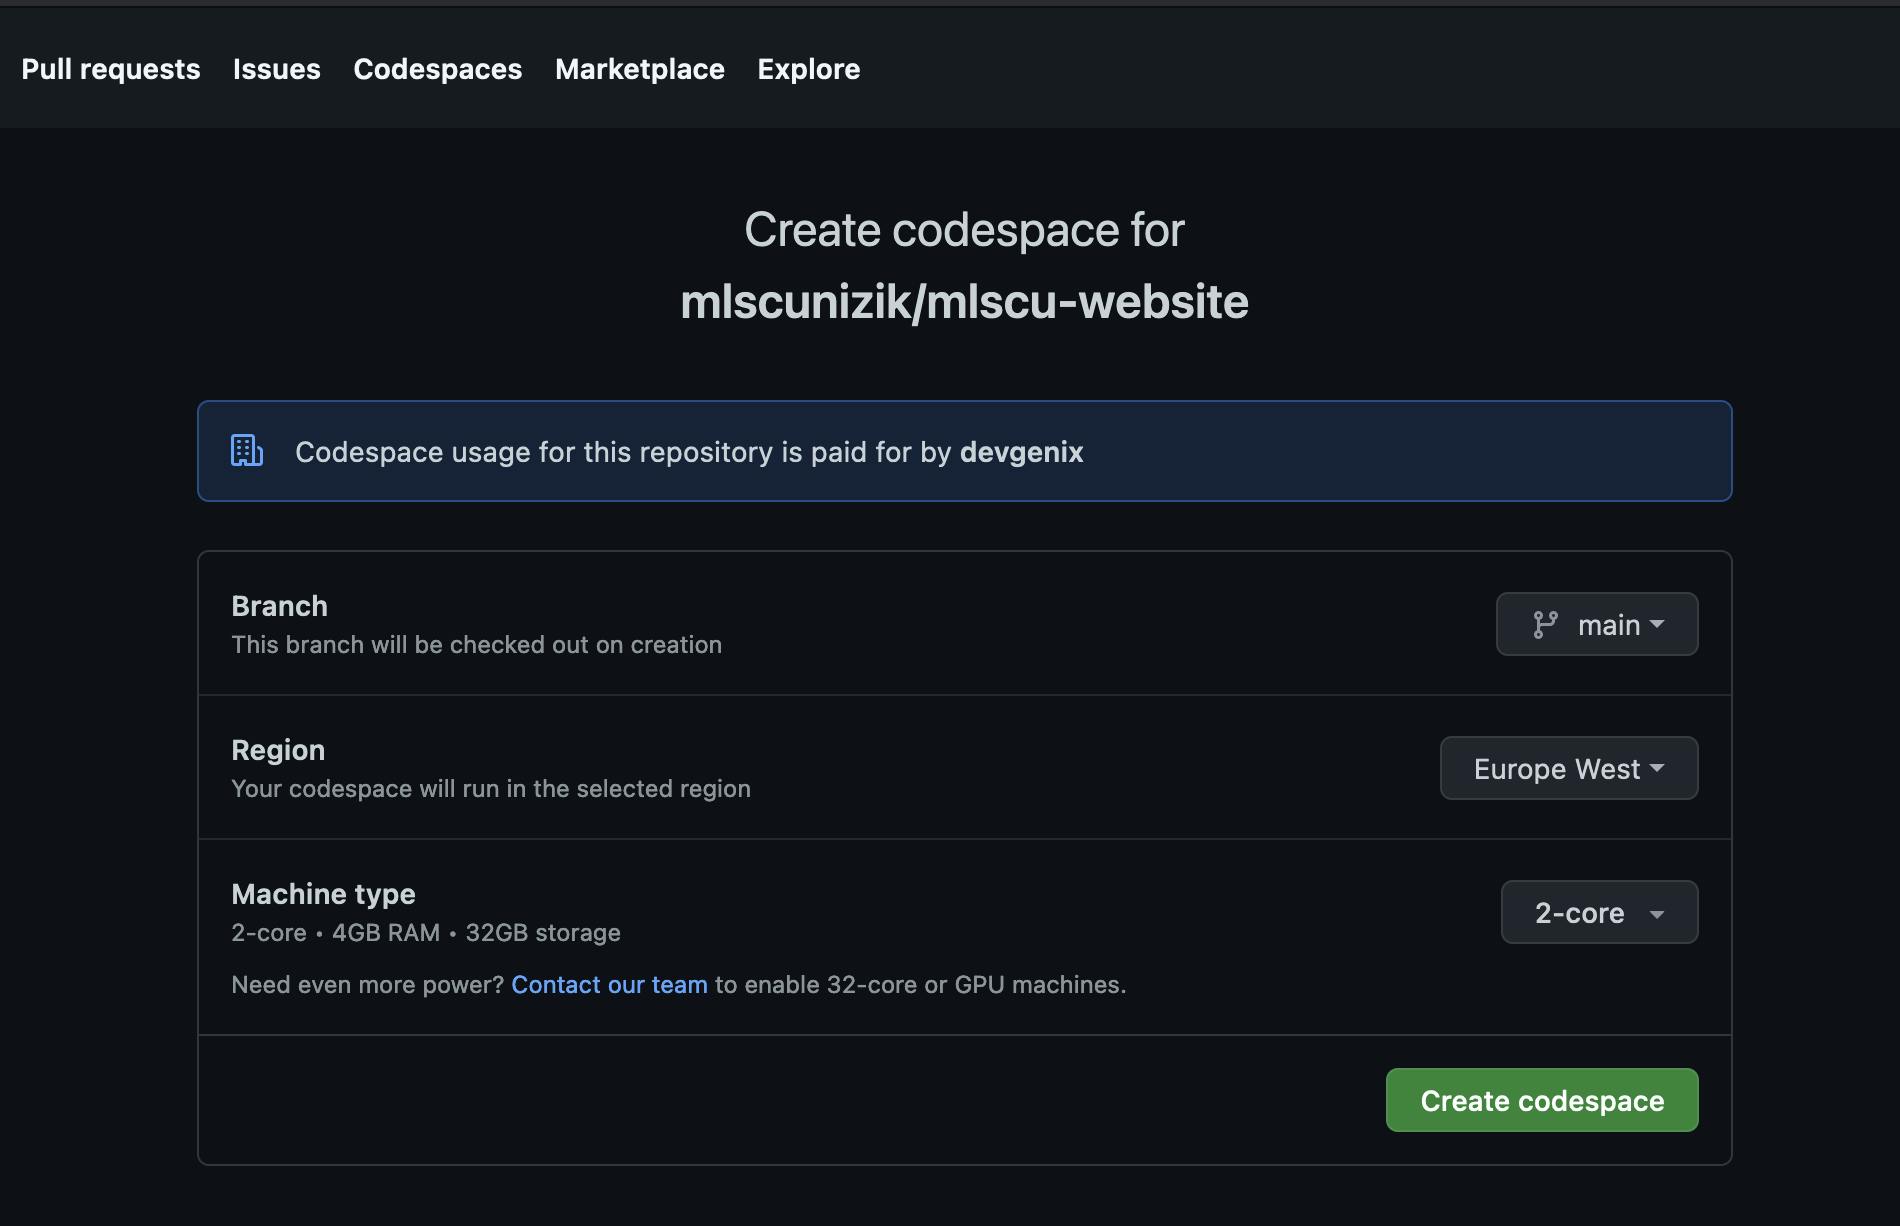
Here's our development environment right in the browser!
Your Codespace is very secure and can only be access by you.

To manage the Codespace created for a repository, click the green button labeled "Code" and in the drop-down click on the Codespaces tab. There you'll see the Codespace for that repository. You can manage the Codespace already created or create another there.
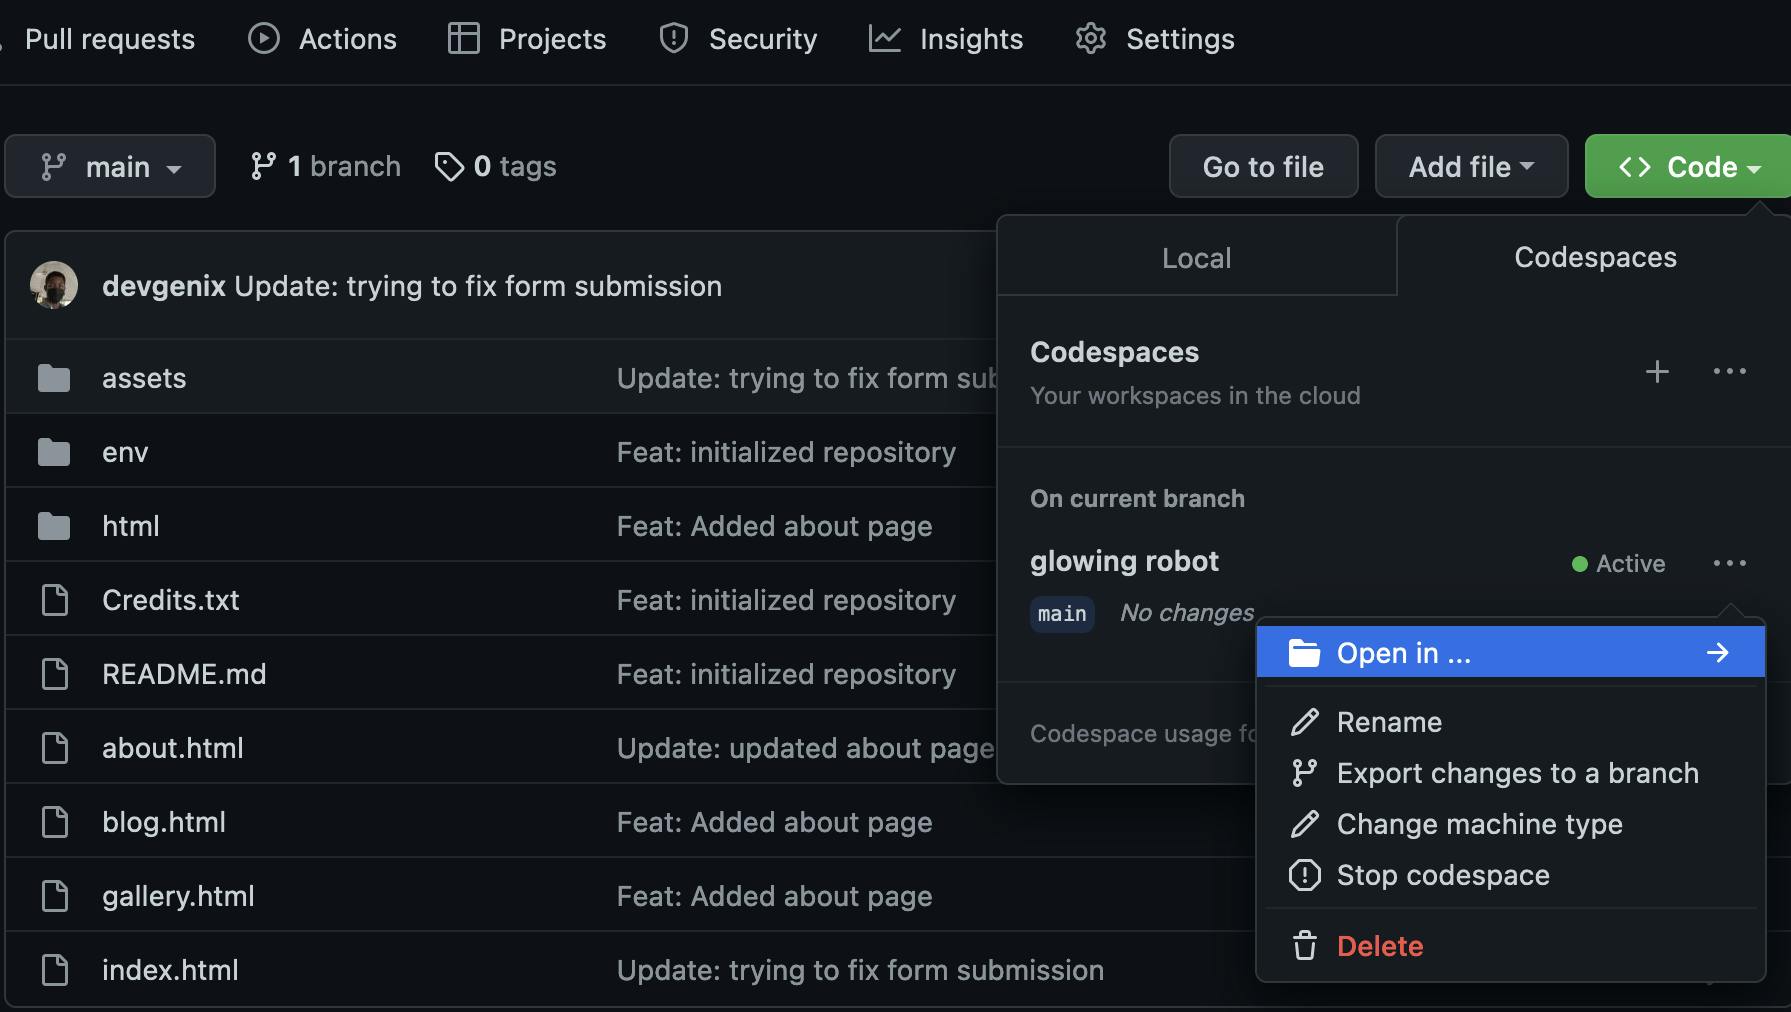
To manage all your Codespaces, click on the Codespaces tab in your GitHub navbar.

Codepsaces Pricing
Ah yes, with good things come a cost, and Codepsaces is no different.
Don't fret, it's not breaking the bank.
Billing is calculated for prebuilds, storage use, and compute use. To manage your billing, you can set a spending limit or limiting the machine options for organizational-owned codespaces.
For individuals, Codespaces is free for 120 hours ( for personal accounts ) or 180 hours ( for Pro accounts ) a month and is only available in two machine options.
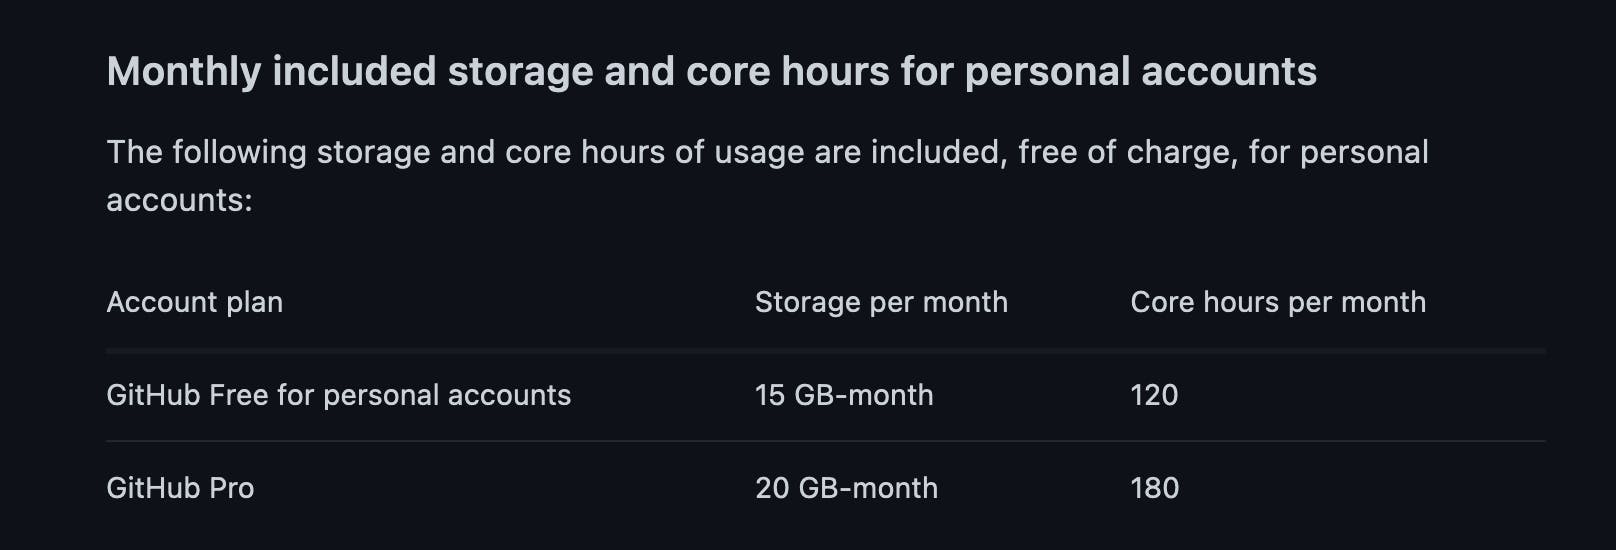
Pricing for Students
If you are a student, you can get access to a Pro account for the time you are a student that gives you 180 hours a month to use Codespaces through the GitHub Student Developer Pack
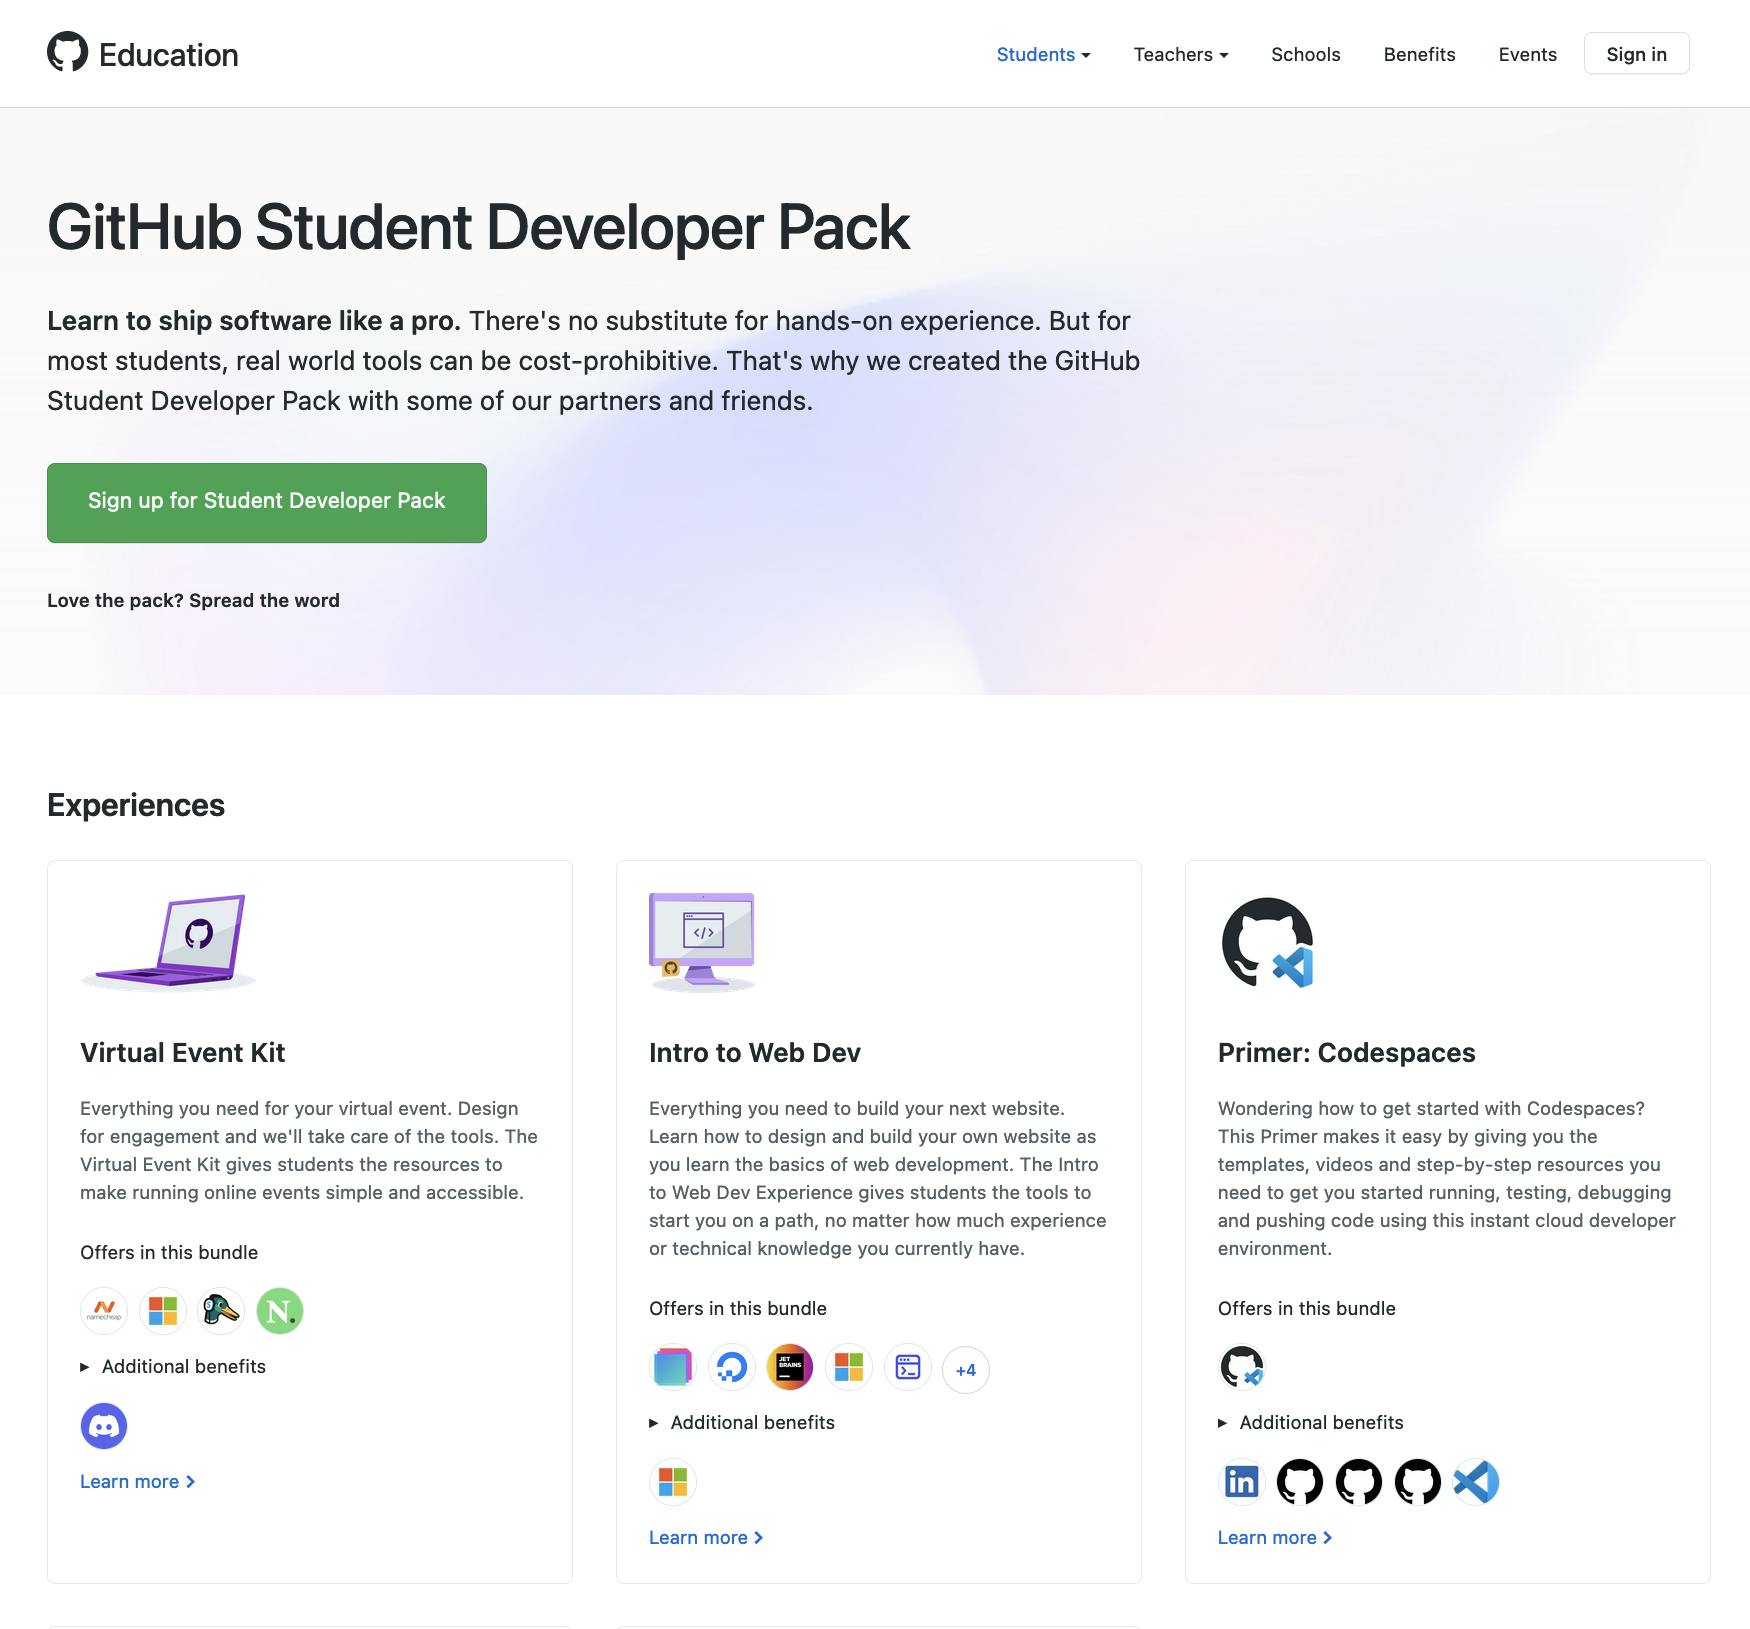
There's no substitute for hands-on experience. But for most students, real-world tools and software can be cost-prohibitive. That's why GitHub created the GitHub Student Developer Pack with partners to provide access to these tools and software for free or at very discounted costs. So more than just Codespaces, you get access to more than 70 other services when you get the GitHub Student Developer Pack.
To get it, you must be a student currently enrolled in a tertiary institution of higher learning and must have a github account.
Sign up for it now.

